Once upon a time …
I had a bar in my basement. It was glorious, it had 4 taps of hoppy goodness flowing most days and was generally a great spot to hang out. Ultimately I decided to remove the bar in preparation for selling the house but that is another story. This post is about how I built up my bar and the adventures I took along the way.
So before we begin let me put a couple things out there.
- I had previously built a kegerator so had the basic understanding of the kegging system and how it worked in hand. That knowledge was important to plan my keezer and bar effectively.
- I know fuck all about building shit. My buddy Noel helped with all the actual building shit and he had the tools, so all credit goes to him for making this dream a reality.
Keezer
As I mentioned earlier my first foray into the home brewing world was to build a kegerator.
Ultimately that unit died and I was onto making this, my first keezer.
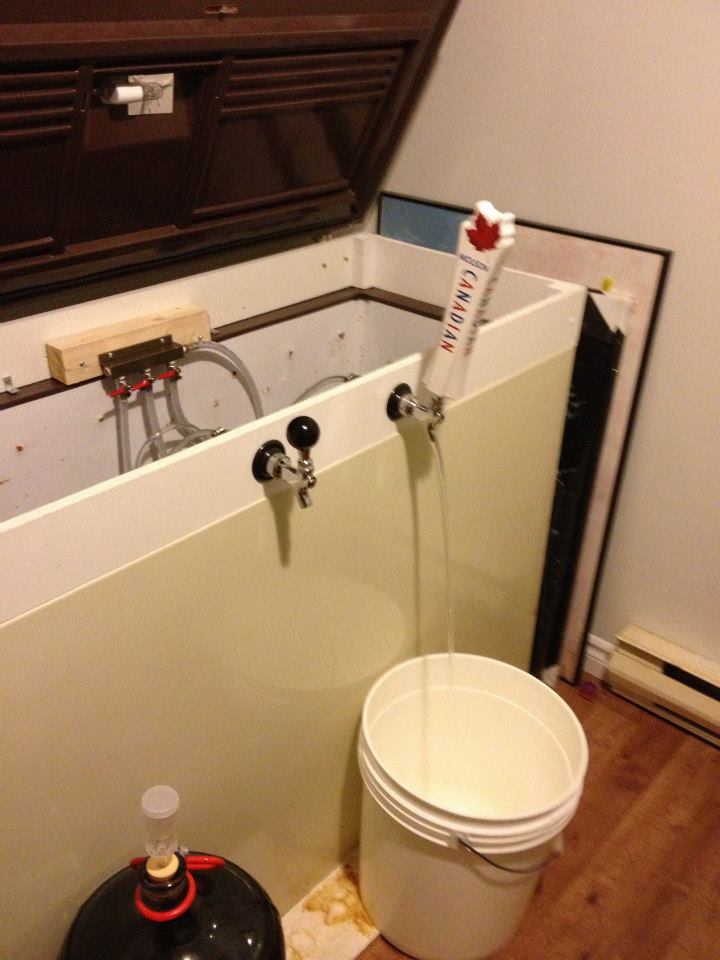
I got the freezer for free off of kijiji and the first task was to install that white collar. Pretty easy in fact, popped the lid off by undoing the screws on the back. Put the collar on, waited for the caulking to dry and then re-attached the lid.
Really quite easy. This gave me room for 6 kegs and I was rotating between 2 taps.
Also needed a drip tray.
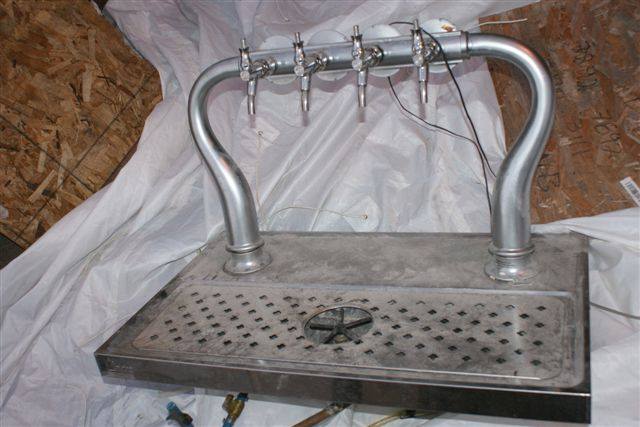
Tower
<< This is the thing that start it all.
I was on the brewnoser forum one day and someone had posted looking for a couple beer taps. At the same time there was an ad for this 4 tap beer tower.
I arranged to sell my 2 taps from my keezer and with that money I would buy the 4 tap tower that was for sale.
Then I needed to figure out a way to make it work. This type of tower wouldn’t work as a ‘coffin keezer’ that sees the tower sit on the lid of the freezer so another solution would need to be figure out.
We decided to build 2 separate pieces, 1 would hold the tower and work as the serving station while the other would hold the keezer.
The plan would have us running beer lines through the collar on the keezer over to the platform where the beer tower was. This would eventually affect the height of the bar (it would need to be high enough for the keezer with the collar on it) but I wasn’t too worried as I am on the taller side.
We framed up the small platform and then mapped out where the bar would go based off of that decision.
Houston we have a problem!
It was at this point I ran into a pretty significant issue.
The tube that acts as the conduit for the beer lines to the taps comes through the base of the tower (as you can see from the pic on the right).
The issue was that there was supposed to be some ‘bolts’ that screwed onto the threaded pieces to hold the entire top half of the tower tight to the bottom half.
These ‘bolts’ were not provided to me with the tower and the seller didn’t have them.
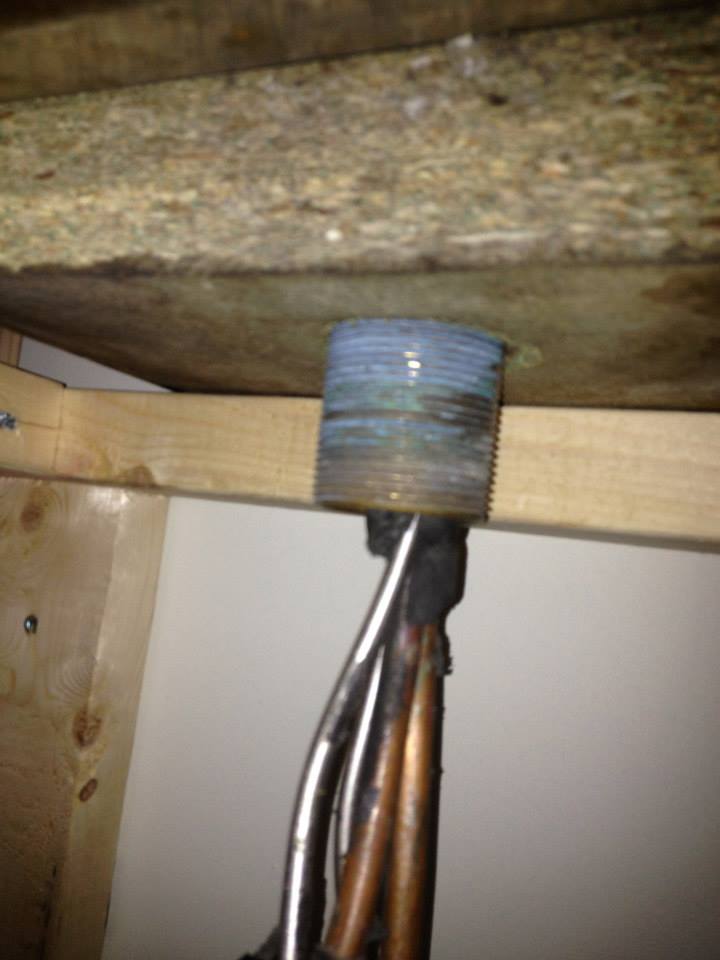
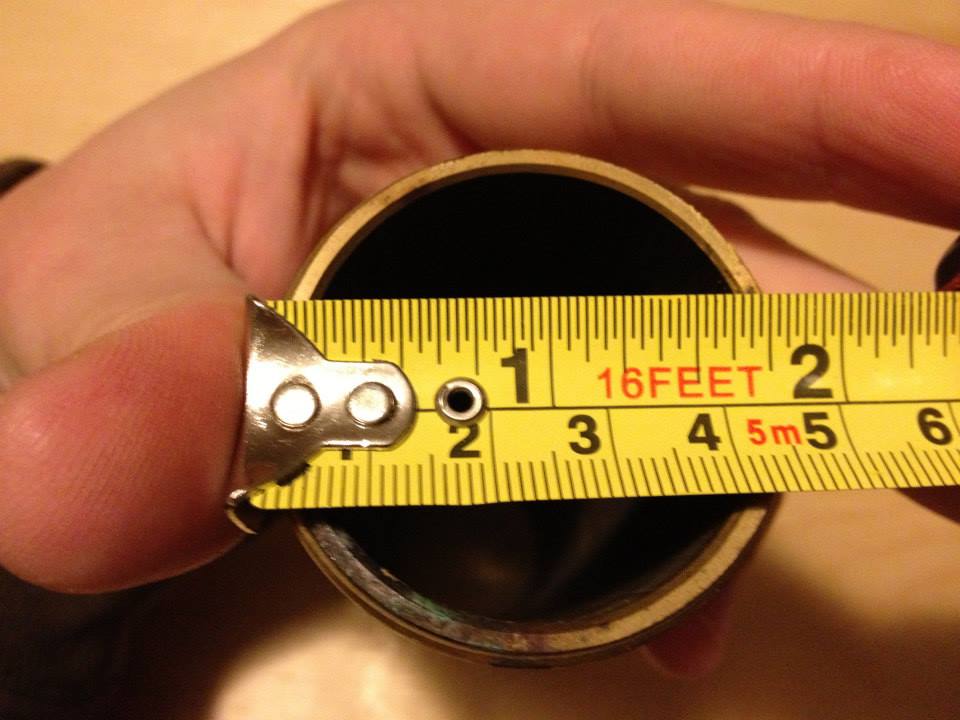
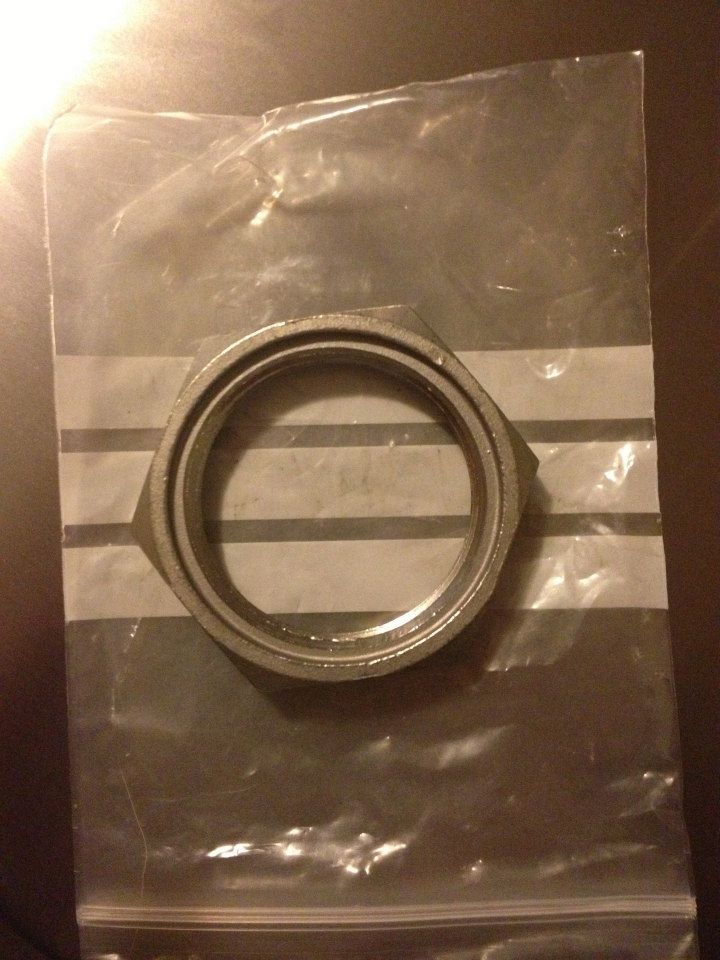
This was a big deal. Not only were the ‘bolts’ mandatory and nowhere to be found, the threading was “Imperial” meaning it was only used in places overseas like Europe.
I called everywhere locally that might be able to help me. I called the plumbing shops, the fastener places, EVERYONE and they all were unable to help.
Finally I ended up talking to a company who installed these keg systems around the city for bars. (my tower in fact came out of the old Bubbles Mansion bar) I thought I was all set I spoke to the manager who told me they had plenty of these parts lying around and I could go to their shop and meet with the shop manager and he would hook me up.
When I finally got a hold of the shop manager he wanted $65 for the ‘shop time’ plus he wanted to charge me $20 for each of the 2 bolts I needed. The total was now up over $100 for a couple minor bolts that should have been included in the original transaction, I was less than thrilled.
In a stroke of pure genius I thought “what if I checked eBay in the UK.” Fifteen minutes later I had 2 bolts on their way to me for less than $20.00 including the overseas shipping cost.
The Bar
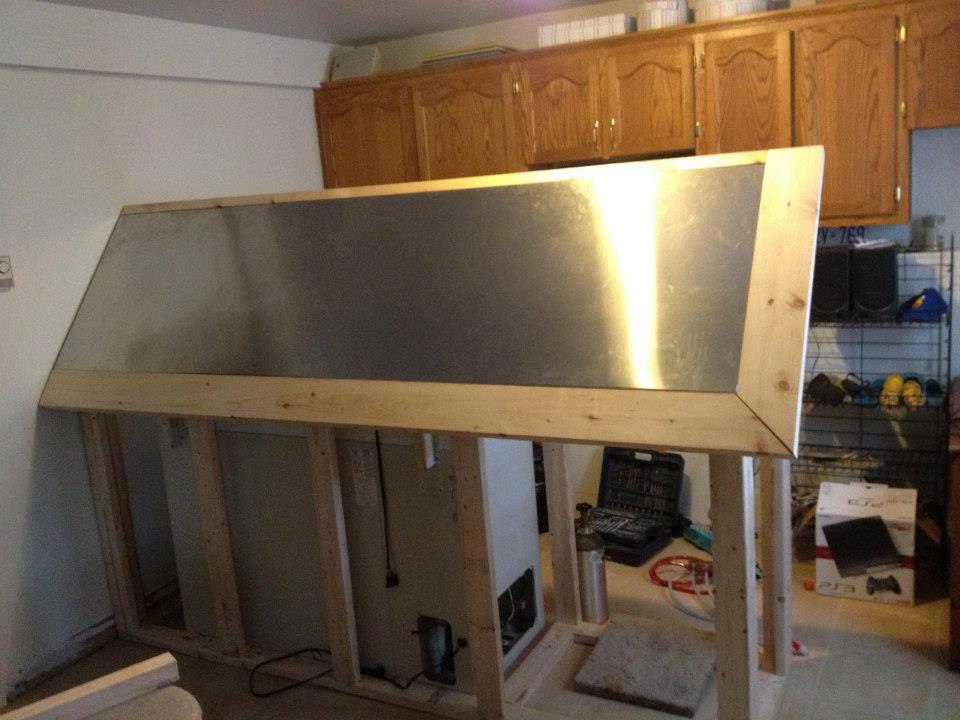
So! Finally it was time to build the bar. Thanks again to Noel this went pretty quickly.
We ended up with an over all length of 8 ft (to account of the long, thin freezer) and a height of about 48 inches. Which is higher than the average of about 41 inches. I did this because I assumed the freezer would die at some point and I wanted to leave plenty of space on all sides for that eventuality.
Bar Top
One of the biggest decisions for this whole project was what to do for the top of the bar. I wanted to put photos down on the plywood and then add a clear polyurethane layer on top of that but getting those supplies in Canada didn’t prove that easy. Instead I called a ‘metal’ guy and had a sheet of stainless cut for my needs and then glued that to the top of the bar. I added a 6 inch border with this really nice wood I got from the lumber yard.

 Hi there,
I'm Mike, welcome to my little corner of the web.
Hope you like what you see here, please leave me a comment whether you did or not.
Hi there,
I'm Mike, welcome to my little corner of the web.
Hope you like what you see here, please leave me a comment whether you did or not. 
Recent Comments